I need to support the ellipses properly. I've tried improvising with the trivets I've already got but it's not working so I need to do something a bit better.
All the trivets I've got are made from stainless steel, they go a dark grey after being fired many times. Any questions about enamel bonding to stainless steel are answered by just looking at one of my old trivets, Oh it sticks alright!
To make this trivet I'm using the stainless steel from some broken Ikea bathroom scales. It should be pretty good stainless steel to guard against rust in a bathroom environment.

The main body of the trivet will have two sides that are folded down to sit on the floor of the kiln, so I need to make the edges straight and parallel.

I cut the furthest side and then reposition the piece in order to cut the front side. I check it's parallel with the first cut using a dial gauge and running the mill table left-to-right, making small adjustments to the positioning of the stainless steel piece.
Next I cut out a triangular support foot and bend the bottom section at right angles to make it stand up on it's own:

Here's a support foot before it's bent:

I just hammer it in the vice


Until it's at right angles, and then take the foot support out of the vice and hammer the rectangular and triangular sections flat.
 .
.
Here's all six of the trivet supports finished:
 .
.
I marked out, roughly, where the support feet need to be on the main section of the trivet
 ,
,
then marked a reference line on all the support feet and placed them around the elliptical shape
 .
.
I wasn't too sure if I should weld the support feet on first and then bend the main section or visa-versa. I checked if my spot welder machine could reach the furthest support foot from one of the edges that wasn't going to be bent at right-angles and it could, so I bend the main section edges like this:
 .
.
I bent them by hammering the corner into the sheet using the square edge on my vice.
 .
.
Here's the spot welder set-up

I've since placed the whole set-up onto a metal plate to guard against flying sparks of molten metal.
All the pieces are cleaned and ready to be welded

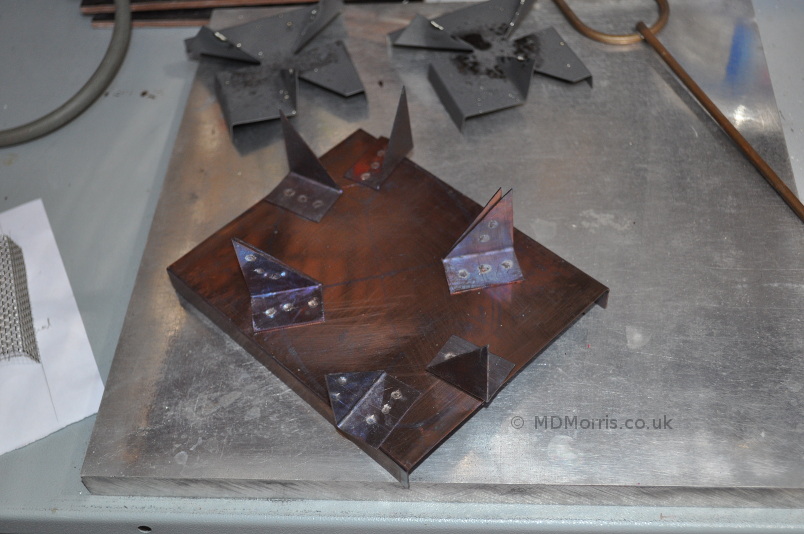
I use some Irwin pliers to clamp the pieces together and then weld with the spot welder:

I use three weld locations for each support foot.
 ,
,
and it's all done. Just need to check that the ellipse fits onto the new trivet...
 ,
,
err,.. not quite, the supports for the minor axis are too far away. I made two more triangle support feet, but this time without the rectangular section at the bottom, and welded these onto the triagular sections of the two support feet already on the trivet, like this:
 .
.
And the same with the opposite side:
 ,
,
to reduce the distance between opposite supports. Now the ellipse fits much better with every one of the support feet touching the ellipse
 .
.
I fire the trivet in the kiln to encourage any fire-scale to form now and ping off before I use it for the enamels
 .
.
Here's the trivet after it's been fired, it's lost it's nice shine, but hasn't gone completely grey yet!
 .
.
The weld joints have held up fine with the firing so I'm confident it will do it's job and support the enamel ellipses when I come to paint them. Here's the first coat of painting enamel and the ellipse placed on the new trivet:
