
The enamel cross project is coming along well. I've got the lower two sections finished and cut out the four upper sections. The previous posts on this project are: part 1, part2, part3, part 4 and there's a new post on cutting out the metal sections here.
And just the bottom two finished sections:

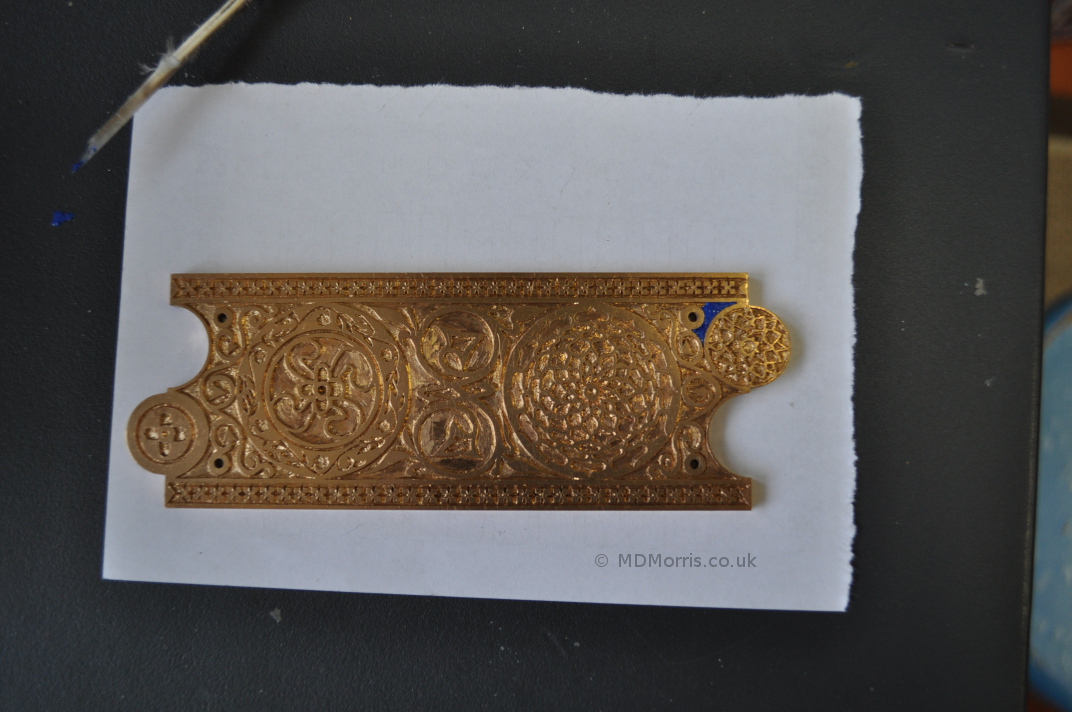
There was quite a lot of shading to do on this section, especially on the white rose. I wanted it to blend in with the background blue but also pick out the white on the lower left and right (as seen when the cross is upright) fluer-de-lis.
Here's some photos of the enamelling stages from where I left off on the previous posts in part3 (it's very similar to what I did in part 4):
Each layer of enamel goes on via wet laying, so I mix the enamel powder with water and apply it to the metal. After the first layer is applied, and before firing, it looks like this:

The piece is placed onto a kiln trivet and fired at a little above 800 degrees C so that, when the mass of metal absorbs the heat, the kiln temperature settles down at 800 degrees. I fire it for about 2.5 minutes, although sometimes 3 minutes if the kiln has not had time to soak.

This is the piece after it's been fired and cooled down:

I put a couple of layers of counter enamel onto the back at this stage to help minimise any bowing of the piece. My mix of scrap enamel is still giving a battleship grey!

After this I built up the enamel in all the recesses and started to create some of the blending of colours. The colour blends need to be established at a reasonable depth below the top surface of the final finish so that the colours don't burn out due to a thin layer. This is especially true with reds which tend to burn to a gray if they're not physically massive enough. I'm also going to grind back the top surface at the end so the colour scheme needs to be at least as deep as the maximum grinding depth.
I didn't take many photos of the intermediate steps but I think there were about a dozen firings in all.
Here's me adding extra enamel to some of the narrow blue sections and the red border, both of which were a bit tricky to get the enamel to flow into all the narrow spaces

I just thought I'd show this next bit as I find it quite interesting, when the piece comes out of the kiln the enamel colours are never the same as they will be when they cool down. The heat shows off a completely different colour scheme that can sometimes be quite inspirational, it's worth having a camera handy! Take a look at this, taken after the piece is nearly finished and just out of the kiln:

The main blue of the cross has turned turquoise and the flowers in the middle, orange!
It's important to make sure the enamel has fully filled all the recesses in the metal. For this I tend to over-fill and then grind back and re-fire. It can look rather scrappy at this stage even though it's nearly done!

Grinding back

After grinding I wash the piece with a toothbrush and then a glass brush just to be sure all the little bits of ground enamel and metal are cleaned away. This is what it looks like after the final grind back but before the final firing, you can see the enamel is matt.

I think I must have added some more red to the roses so the previous picture was probably not the final grind back after all! I tend to grind the piece back, gently, a few times before the final time in order to get a good idea how the colours are coming along. I'm pretty sure this next photo is after the final firing:

Next stage is a polish with wet pumice and jeweler's rouge. Here's the pumice polishing in action:

It's quite messy!
As before I've set the piece into plastic to minimize any radii that maybe created by the polishing wheel. After a while I found this set-up a bit tricky and took the piece out of the plastic but made sure the wheel was moving away from the edge and not into the edge of the piece.
Here's what it looks like after polishing with rouge and cleaning up:
